Today, let's look at how to use jconsole and visualVm to monitor jvm memory on a Linux server.
recently, i met the java memory error so i studied java memory structure
and i found jconsole and visualVM which are tools that possible to monitor java memory utilization, available and capacity
jconsole and visualVm provide GUI-style memory informations
so if i could access remotely, it would be useful tool
now let's start
First of all, i'll tell you about my server and local environmental
server
OS : Amazon linux2
WAS : tomcat7
java8
LOCAL
window, java
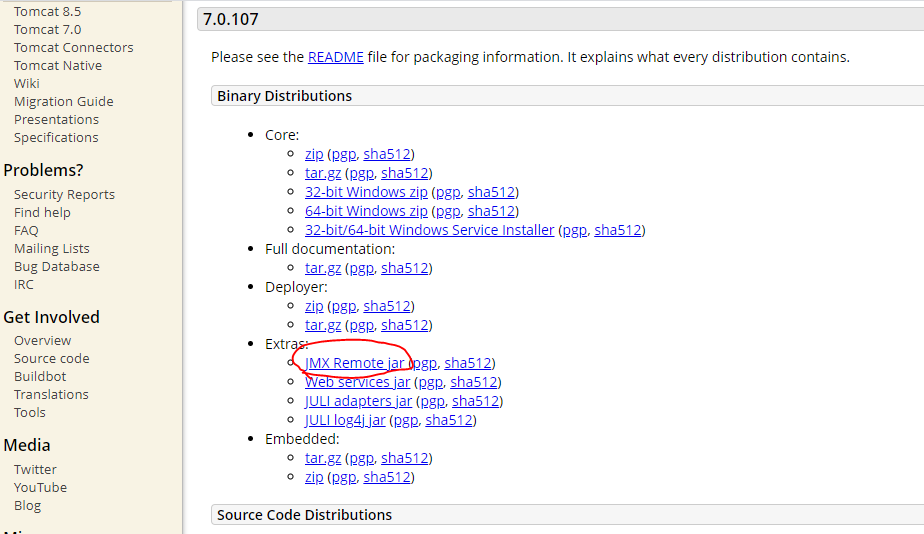
[Download JMXRmote.jar in your Server ]
I'll download jmx remote.jar to my local and move it to my linux server
먼저, 로컬에서 톰캣 다운로드 페이지에 가서 자신의 버전에 맞는 jmx remote.jar 파일을 다운받아주세요.
first of all, Download jmx remote.jar that matches your tomcat version from the site below
tomcat.apache.org/download-70.cgi
tomcat.apache.org
and move it in [lib] folder that exists in your server's tomcat home directory
i put it directly through filezilla
i

As above, you can see that catalina-jmx-remote.jar is in lib folder of the tomcat home directory
You have to put it in the lib folder of your Tomcat home directory.
It may be different from my directory path
[Create setenv.sh file on your server]
서버의 톰캣 홈디렉토리의 bin폴더에서 setenv.sh를 작성하겠습니다.
i will create setenv.sh in the [bin] folder in the servers' tomcat home directory
vi /usr/local/tomcat7/bin/setenv.sh
in my case, my tomcat home directory path is '/usr/local/tomcat7', so i setted like above
You will need to find and add your own Tomcat home directory path
and then add below code
#!/bin/sh
JMX_OPTS=" -Dcom.sun.management.jmxremote -Dcom.sun.management.jmxremote.authenticate=false -Djava.rmi.server.hostname=your server ip -Dcom.sun.management.jmxremote.ssl=false"
CATALINA_OPTS=" ${JMX_OPTS} ${CATALINA_OPTS}"
and write public ip of ec2 instance in the part marked your server ip

Grant execution attribute 755 permission to setenv.sh file
chmod 755 /usr/local/tomcat7/bin/setenv.sh
[Modify server.xml file in tomcat]
Open the server.xml file which is in your tomcat home directory's conf folder through vi editor
vi /usr/local/tomcat7/conf/server.xmland add below <linstner> tag
<Server port="8005" shutdown="SHUTDOWN">
  <Listener className="org.apache.catalina.mbeans.JmxRemoteLifecycleListener" rmiRegistryPortPlatform="9840" rmiServerPortPlatform="9841"/>
Not <server port="8005" .. > but add only <Linstner .... "9841" /> at the bottom of <server>
<server port="8005" shutdown=""SHUTDOWN"> is the original code
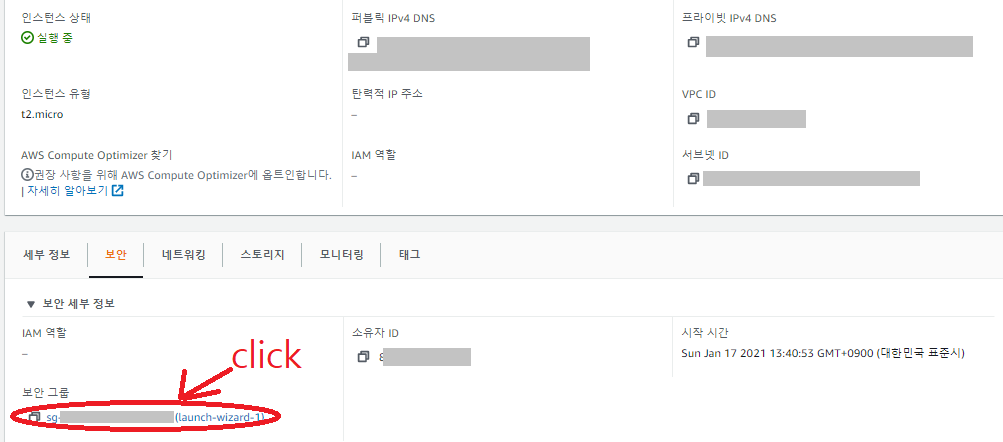
[Edit security group in AWS Console]
Come back local, and edit security group in AWS Console
Click your security group used by your ec2 instance
보안그룹에 들어왔다면 인바운드 규칙 편집을 눌러주시고
If you entered security group page, click 'Edit inbound rules'

As above, Open 9840 port and 9841 port
Ok now, the setting is ended
Restart tomcat
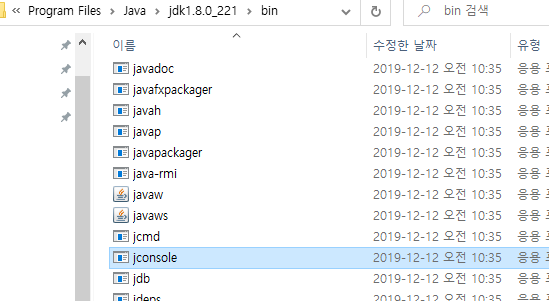
and let's connect jconsole
Go to [bin] folder in local's java home directory and run the jconsole.exe

select 'Remot Process:' radio button
write down the 'public ip:9840' or 'public ip:9841' and connect

Click Insecure connection button because we disabled ssl connection
.
yes, connection complete
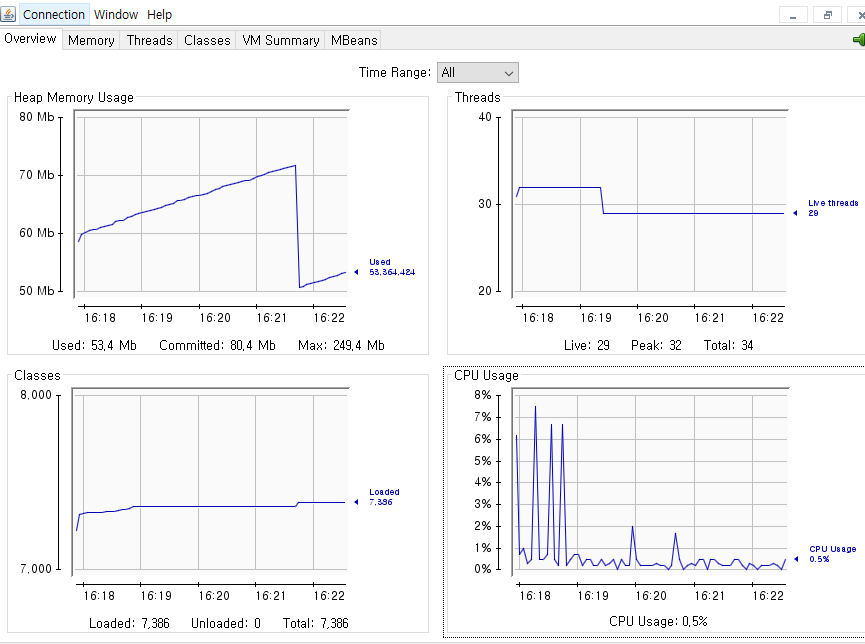
you can see this image
Heap memory, thread and CPU usage are very convenient and userful information for managing java application
Next, let's connect VisualVM
likewise, run the jvisualvm.exe in your bin folder of java home directory


and then right-click on [Remote] icon and you can see add host. click it

write down public ip on host name: box and remove default port
you can remove it with clicking 'Advanced Settings'
and Click 'OK"

if you followed me as tried
you can see new icon which name is public ip that we wrote

right-click new icon and click 'Add JMX Connection'
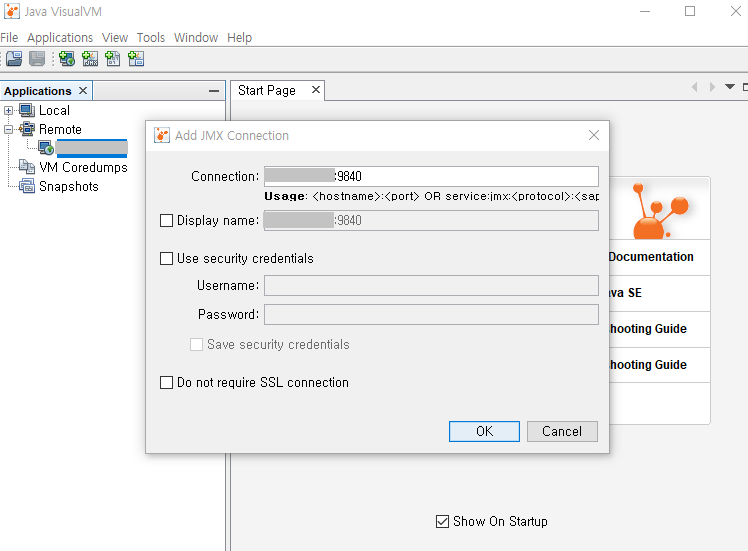
write down 9840 or 9841 next to the public ip and don't check any checkbox
yes, also complete

Finally, we finished remote connect to linux server with jconsole and visualVM
however we did not set ID and password authentication
this way is very dangerous
the article is too long, so please refer to the below link if you want
Comments
Post a Comment